
 Anna Louise
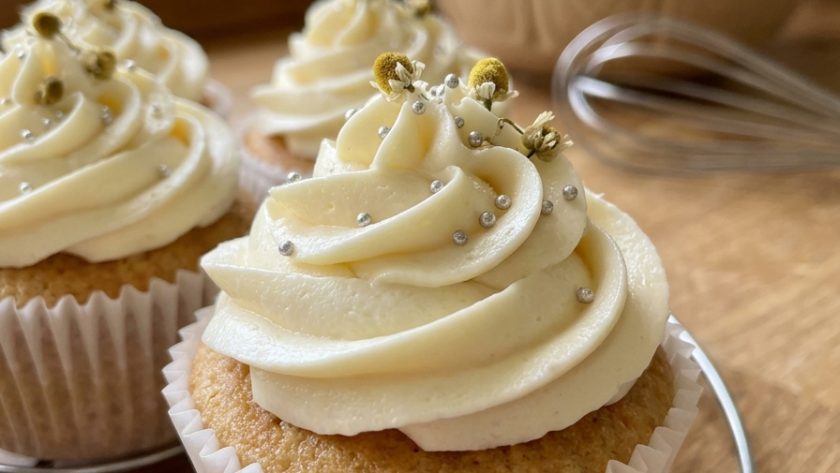
 A perfect vanilla cupcake is harder to achieve than it sounds. The sponge must be genuinely light — not dense, not dry, not so fragile it falls apart.
The buttercream must be smooth and silky — not grainy, not so sweet it is cloying, not so stiff it tears the sponge when spread.
And the whole thing must look as good as it tastes — a neat dome, a generous swirl, a finish that makes people reach for one before they have finished the conversation.
Mary Berry’s vanilla cupcakes recipe produces all of this reliably. The sponge is the all-in-one method — everything into one bowl, beaten together — with a small addition of soured cream or yoghurt that gives an extra tenderness and keeps the crumb moist for days.
The vanilla buttercream is made properly — butter beaten pale and fluffy before a single grain of icing sugar is added — and flavoured generously with good vanilla extract.
These are the cupcakes that work for every occasion, that everybody loves, and that keep fresh for three days without drying out.
What Makes These Cupcakes Work
Soured cream in the batter. A tablespoon of soured cream or full-fat Greek yoghurt added to the batter gives the cupcakes an extra tenderness and a very slight tang that makes the vanilla flavour more complex and interesting. It also keeps them moist significantly longer than a plain butter-milk sponge.
Good vanilla extract — not essence. Vanilla extract made from real vanilla beans gives a warm, rounded, genuinely vanilla flavour. Vanilla essence is synthetic and tastes one-dimensional. Use extract and be generous with it.
Butter beaten alone for four minutes. The most important step in making great buttercream. Four minutes of beating butter before any icing sugar is added creates an aerated, pale, almost white base that gives the finished buttercream a lightness and silkiness that cannot be achieved any other way.
Ingredients for Mary Berry Vanilla Cupcakes
For the Vanilla Cupcakes (Makes 12)
- 175g unsalted butter, softened
- 175g caster sugar
- 3 large eggs, at room temperature
- 175g self-raising flour, sifted
- 1½ tsp baking powder
- 2 tbsp whole milk
- 1 tbsp soured cream or full-fat Greek yoghurt
- 2 tsp good quality vanilla extract
For the Vanilla Buttercream
- 200g unsalted butter, softened
- 400g icing sugar, sifted twice
- 2–3 tbsp whole milk
- 2 tsp good quality vanilla extract
- Pinch of fine salt
To Decorate
- Sprinkles, sugar flowers, or fresh berries
- A dusting of icing sugar
- Edible gold or silver balls
How to Make Mary Berry Vanilla Cupcakes — Step by Step
Step 1 — Preheat and Prepare
Preheat your oven to 180°C / 160°C fan / Gas 4. Line a 12-hole muffin tin with paper cupcake cases.
Step 2 — Make the Batter
Place the softened butter, caster sugar, eggs, sifted flour, baking powder, milk, soured cream, and vanilla extract into a large mixing bowl.
Beat with an electric hand whisk on medium speed for two to three minutes until smooth, pale, and well combined. Scrape down the sides halfway through. The batter should be smooth and drop off the beaters in thick ribbons.
Step 3 — Fill and Bake
Divide the batter evenly between the twelve cupcake cases — fill each one about two-thirds full. An ice cream scoop makes this easier and more consistent.
Bake for 18 to 20 minutes until the cupcakes are risen, golden, and a skewer inserted into the centre comes out clean. The cupcakes should spring back when pressed lightly in the centre.
Leave in the tin for five minutes then transfer to a wire rack. Cool completely before frosting — at least 45 minutes.
Step 4 — Make the Vanilla Buttercream
Beat the softened butter alone with an electric hand whisk for four full minutes until very pale, almost white, and genuinely fluffy. This step creates the aerated base that makes this buttercream so light.
Add the sifted icing sugar in three batches, beating well after each. The buttercream will look slightly rough and dense as the icing sugar is added — keep beating and it will come together.
Add the vanilla extract, a pinch of salt, and enough milk to bring the buttercream to a smooth, glossy, pipeable consistency. Beat for a further two minutes until completely smooth. The finished buttercream should hold a firm peak when the whisk is lifted but still look soft and silky.
Step 5 — Pipe or Spread
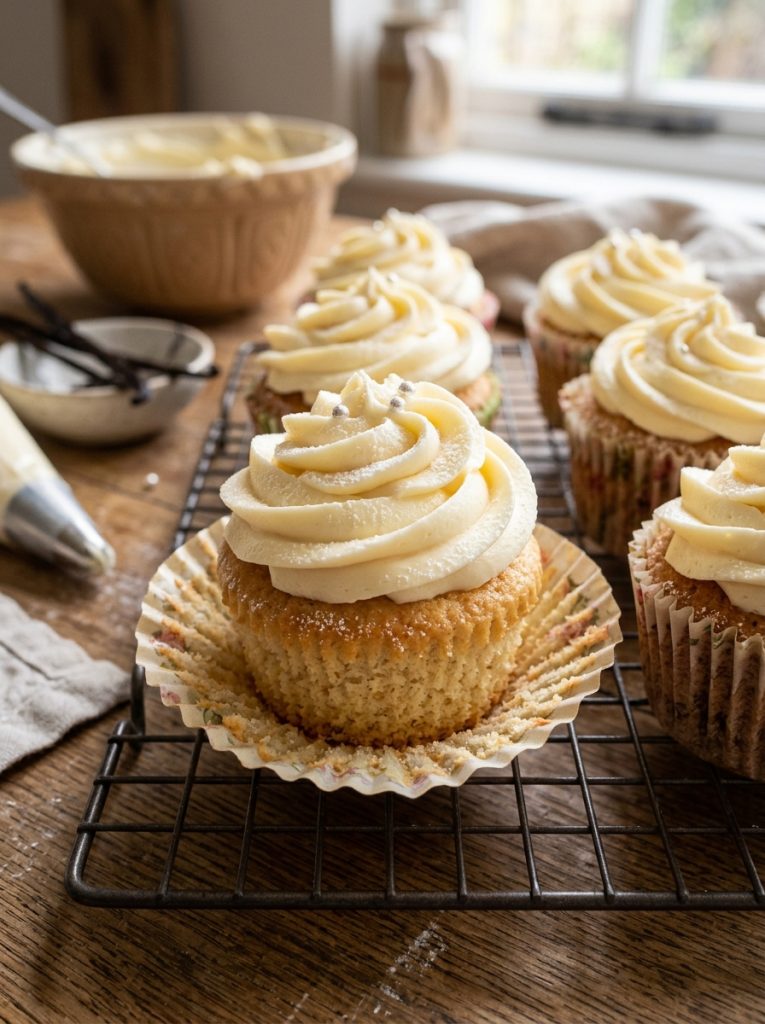
Transfer the buttercream to a piping bag fitted with a large star nozzle (1M gives the classic swirl). Pipe a generous swirl onto each completely cooled cupcake — start at the outer edge, spiral inwards and upwards to a central peak, then release pressure and lift sharply.
Alternatively, spread generously with a palette knife for a more relaxed finish.
Decorate with sprinkles, sugar flowers, or whatever suits the occasion.
My Top Tips For Perfect Vanilla Cupcakes
Fill cases exactly two-thirds full. This gives a beautiful dome every time. Underfilled cases produce flat cupcakes. Overfilled cases spread sideways and produce a flat, wide top without the characteristic dome.
Soured cream makes a noticeable difference. A single tablespoon of soured cream or Greek yoghurt in the batter gives a tenderness and moisture that keeps these cupcakes fresh and soft for longer than a plain sponge. Do not skip it.
Cool completely before frosting. Warm cupcakes melt buttercream immediately. Forty-five minutes on a wire rack is the minimum. If you are in a hurry, refrigerate the cupcakes for fifteen minutes to speed cooling.
Beat butter alone for four minutes. Set a timer. This step is what separates light, silky buttercream from dense, heavy frosting. The four minutes is not negotiable.
Use a pinch of salt in the buttercream. Salt cuts the sweetness of the icing sugar and brings out the vanilla flavour. Without it, buttercream can taste cloyingly sweet and slightly flat.
Pipe from the outside in. Start the nozzle at the outer edge of the cupcake, apply steady pressure, spiral slowly inwards and upwards. Release pressure and lift sharply for a clean peak. Hesitation shows in the piping — work with confidence.
Serving Suggestions
At a birthday party — decorated to suit the theme and colour scheme. At a bake sale — these sell out reliably and look genuinely impressive. As part of an afternoon tea spread. For a child’s birthday with bright sprinkles and bold colours. As a simple gift in a small box tied with ribbon.
How to Store Vanilla Cupcakes
At room temperature: Store in an airtight container for up to 3 days. The soured cream in the batter keeps them notably more moist than a standard vanilla sponge.
In the freezer: Freeze unfrosted cupcakes individually wrapped in cling film for up to 3 months. Defrost at room temperature and frost fresh once defrosted.
Try These Recipes
- Mary Berry No Bake Chocolate Cheesecake
- Mary Berry Lemon Drizzle Cake In Loaf Tin
- Mary Berry Chocolate Cupcakes
- Mary Berry Devonshire Scones
Mary Berry Vanilla Cupcakes Recipe
Ingredients
Method
- Preheat oven to 180°C / 160°C fan / Gas 4. Line a 12-hole muffin tin with cupcake cases.
- Place butter, sugar, eggs, flour, baking powder, milk, soured cream, and vanilla in a large bowl. Beat with electric whisk 2–3 minutes until smooth and pale. Scrape down halfway.
- Fill cases two-thirds full. Bake 18–20 minutes until risen, golden, and a skewer comes out clean. Cool in tin 5 minutes. Transfer to wire rack. Cool completely.
- Beat butter alone 4 minutes until very pale and fluffy. Add icing sugar in 3 batches — beat well after each. Add vanilla, salt, and milk until smooth and pipeable. Beat 2 more minutes.
- Pipe or spread generously onto cooled cupcakes. Decorate. Serve at room temperature.
Notes
Frequently Asked Questions
Can I use plain yoghurt instead of soured cream?
Yes — full-fat plain yoghurt works identically to soured cream in this recipe. The fat content is important — low-fat yoghurt gives a slightly less moist result.
Can I make these without an electric whisk?
Yes — beat vigorously by hand with a wooden spoon for three to four minutes for the batter and five to six minutes for the buttercream. A stand mixer makes both faster and easier.
Can I add lemon or another flavour?
Yes — add the zest of two lemons to the batter and replace the vanilla in the buttercream with lemon juice and zest for lemon cupcakes. The same base recipe adapts to any flavour.
Why are my cupcakes doming then sinking?
The oven was too hot — the cupcakes rose quickly but the centre was not set and sank as they cooled. Reduce the temperature slightly and bake for a minute or two longer.
Can I make these as a cake?
Yes — pour the batter into two 18cm sandwich tins and bake for 22 to 26 minutes. Fill and top with the full quantity of buttercream.
How do I get perfectly even cupcakes?
Use an ice cream scoop to divide the batter — it gives consistent amounts every time. Weigh each scoop onto a scale for the most precise results.













Leave a Reply